Thursday, August 05, 2004

We're Moving!

We've moved off of the blogspot.com servers to www.cookingforengineers.com. Please update your bookmarks.

Unfortunately, all comments posted on the blogspot servers were not transferred to the new server, but feel free to repost your comments!

Monday, July 26, 2004

Recipe File: Basic Granita

Granita is an easy and tasty treat for the summertime that doesn't require any special equipment. It can be made with virtually any sweet liquid - juice, diluted italian soda syrup, soft drinks, etc.

In a medium saucepan, combine the sugar and water and bring to a boil, stirring until the sugar dissolves. Let cool. Stir in the fruit juice and lemon juice and pour into a chilled 13- by 9-inch metal baking dish. Place in the freezer and freeze, stirring every 30 minutes until the mixture is firm.

Bring 1 cup water with 1/2 cup granulated sugar to a boil.


Allow sugar and water to cool to room temperature. Pour three cups of orange juice or other fruit juice into the cooled syrup.


Pour mixture into 13 x 9 in. baking pan and place in freezer. I had to use an 8 x8  in. pan because all my 13 x 9 in. pans were in use. It takes about twice as long to freeze in an 8 x 8 in. pan.


Every twenty minutes (forty if using an 8 x 8 in. pan), take the pan out and scrape the frozen mixture with a fork until all the frozen pieces are broken into small shavings and mixed well with the remaining liquid. Continue to freeze. Scrape every twenty minutes until no more liquid is in the granita.


I like to serve the granita in a wine glass with some lemon zest and a sprig of mint on top.


Basic Granita
1 cup watermixboilcoolmixcoolfreeze scraping every 20 min.
1/2 cup sugar
3 cups fruit juice
2 tsp. lemon juice

Friday, July 09, 2004

Recipe File: Meat Lasagna

Homemade lasagna is always a favorite at potlucks or a nice dinner at home. Although it has many ingredients, the recipe is pretty hard to mess up (although I did mess up while making this one). Here's my recipe for a simple meat lasagna.

There's quite a few ingredients, so I took two pictures: sauce ingredients and layer ingredients.

To speed things up, I use a food processor to finely chop six cloves of garlic and then a medium onion. In addition, I use a 28 oz. can of pureed tomatoes and a 28 oz. can of diced tomatoes. For the meat, I use 1/2 pound ground beef and 1/2 pound italian sausage with the casings removed. I used ground beef from the round for the illustrations because it happened to be on sale. Ground chuck is also excellent. A 1/4 cup of heavy cream is also needed for the sauce.


For the layers, I use 15 oz. container of whole milk ricotta cheese, 16 oz. mozzarella, 1-1/4 cup Parmesan cheese, 1 large egg, and on 8 oz. package of oven ready (no-boil) lasagna noodles. I grated the mozzarella in the food processor and used a microplane zester to grate the Parmesan cheese. Avoid using the pregrated cheeses because they are often additives that keep the cheese from clumping and make them last longer, but alter the taste. The egg should be lightly beated with a fork. We'll come back to these ingredients in a few minutes.


First, heat a large pan or pot (a dutch oven works well) over medium flame. I used a six quart saute pan for this article. Pour 1 tablespoon oil into the heated pan. After it begins to shimmer, put the finely chopped onions into the pan. Cook for about two minutes, stirring occasionally. We want the onions to soften but not brown.


Add garlic at this point and cook for another two minutes - stirring occassionally. Try not to brown the garlic.


Once the garlic is fragrant, add the ground meat and increase heat to medium-high. Break up any large clumps of meat while stirring. I use a wooden spoon and just jab at any large pieces. Add salt and pepper to taste (I like about 1/2 teaspoon of each). Cook until the meat loses it's pink color, but not start to brown (about three to four minutes). Now stir in 1/4 cup heavy cream to help hold the meats together a bit. Allow the mixture to simmer and thicken until most of the water in the cream has evaporated.


Now, add a can of pureed tomatoes and a can of diced tomatoes (drained). Stir the mixture until evenly distributed and bring to a simmer. After bubbles begin to form, lower the heat to low and cook for a few more minutes. The sauce is now done and we can set this aside to work on the layers.


For the layers, put the ricotta cheese, a cup of parmesan (reserving 1/4 cup for use later), the chopped basil, beaten egg, and some salt and pepper (about 1/2 teaspoon each works well) into a medium bowl for mixing.


Mix the ricotta and flavorings together with a fork, spoon or spatula until it's relatively smooth.


Now, we're ready to build the lasagna. Most of the time, people build the lasagna in the 13 x 9 in. baking pan, but I saw an episode of America's Test Kitchen where they prepared the layers outside of the pan. This turns out to be an easy and fast way of putting the layers together (also works if you have a helper in the kitchen - one person can prepare the layers while the other builds the lasagna). This method starts by laying out all twelve pieces of the lasagna noodles. Then spoon the ricotta mix unto each noodle - about two tablespoons each. Distribute any excess evenly and flatten the ricotta onto each noodle.


Assembling the lasagna is easy, but pay attention to what you are doing and how many layers there will be (I didn't and ran out of meat sauce because I was too liberal with it on the bottom layers). Prepare a 13x9 in. baking pan by applying a thin layer of meat sauce to the bottom, using just enough sauce to coat.


Then place three lasagna noodles (with the ricotta facing up) into the pan. Then cover the noodles with a fourth of the shredded mozzarella cheese.


Spoon enough meat sauce to cover the mozzarella and place another layer of lasgna noodles. Repeat with mozzarella, meat sauce, lasagna noodles, mozzarella, and meat sauce. Be careful how much meat sauce you use because I lost track of how many layers I was building and used all the meat sauce - not leaving any to top the final layer.


The top layer of noodles goes on the meat sauce, upside down. Cover this layer with the remaining sauce. This is when I realized I didn't have anymore sauce. By not covering this final noodle layer, I was guaranteed a very hard, dry covering that would probably need to be peeled off before eating the lasagna. I'll take pictures of a correctly made lasagna, the next time I make one and repost here.


Cover the top layer of red sauce with the remaining mozzarella cheese and then sprinkle the final 1/4 cup of parmesan on top. This lasagna can now be cooled, wrapped and stored in the refrigerator for a couple days or frozen for a month.

Before baking, cover the top with aluminum foil. To help prevent cheese from sticking to the aluminum foil, brush or spray some oil onto the foil. Place the lasanga onto the middle rack in a preheated 375°F oven for 15 minutes. I like to place the pan in a baking sheet in case any bubble over occurs. After fifteen minutes have passed, remove the foil and continue baking for 25 more minutes. Remove from the oven and allow the lasagna to cool for a few minutes before cutting and serving.


Meat Lasagna (six large servings)
1 Tbs. olive oilcookaddaddstir inbring to simmerassemble375°F for 15 min. covered375°F for 25 min. uncovered
1 medium onion, chopped fine
6 garlic cloves, minced
1/2 lb. ground beef
1/2 lb. italian sausage, casings removed
1/2 tsp. salt
1/2 tsp. ground black pepper
1/4 cup heavy cream
28 oz. puree tomatoes
28 oz. diced tomatoes, drained
15 oz. ricotta cheesemixspread ontop
1-1/4 cup grated Parmesan cheese
1/2 cup chopped basil leaves
1 large egg, beaten
1/2 tsp. salt
1/2 tsp. ground black pepper
12 oven ready lasagna noodles
16 oz. mozzarella cheese

Layer diagram
4 oz. mozzarella cheese and 1/4 cup parmesan cheese 
meat sauce 
lasagna noodles 
ricotta mixture 
meat sauce 
4 oz. mozzarella cheese 
ricotta mixture 
lasagna noodles 
meat sauce 
4 oz. mozzarella cheese 
ricotta mixture 
lasagna noodles 
meat sauce 
4 oz. mozzarella cheese 
ricotta mixture 
lasagna noodles 
thin meat sauce layer 


Wednesday, July 07, 2004

Recipe File: Pan Fried Fish Fillets

Last week I roasted a four pound cross rib roast (instead of a standing rib roast because I was too cheap to by prime rib just for an article). Well, I finally finished eating the roast. (After the initial feast, I sliced the roast into steaks and then reheated on a skillet for a couple minutes on each side with some onion powder and celery salt to produce a tender medium to medium-well steak dinner.) After eating steak (and grilled beef of several varieties because of the July 4th weekend), Tina decided she would like some fish.

We had some fairly thick fillets (about one inch) of catfish that I decided to pan fry (or saute, but I usually reserve this word for food that will actually be constantly moved on the pan). I always use a large non-stick skillet whenever I want to pan fry fish, but I had four fillets of catfish. I decided to do an experiment and cook all four at the same time - two on my non-stick skillet and two on my traditional saute pan.

My main concern was that the fish would stick to the stainless steel bottom of the traditional pan. After doing some research, it seemed that the Editors of Cook's Illustrated (in The Best Recipe) believed that heating a traditional pan enough prior to cooking would allow the fish to not stick to the stainless steel. I thought it was worth a try.

I heated both pans at medium-high heat. While the pans were heating, I seasoned the four fillets simply with salt and pepper. I poured about a tablespoon of oil in both pans and watched the oil until it shimmered. Then I placed two fillets in the non-stick pan and two fillets in the traditional pan. I started with the skin side up.

Since the fillets were about an inch in thickness, I set my timer for 5 minutes. I let the fish sit there and cook, splattering oil everywhere for the duration before attempting to dislodge them. The non-stick was pretty straightforward. I picked up the pan byt he handle and gave it a firm jerk. The fish fillets slide about an inch on the pan. Then I flipped them over with a spatula and started another timer for five minutes. I then moved over to the traditional pan and gave it the same jerk. No movement. I prodded a little with my spatula and it seemed like the fish was pretty much sealed to the pan. I dribbled a little more oil in and let it cook for an additional thirty seconds. Then I tried the jerk again. Nothing. Not wanting to over cook the fish, I went in with my spatula and carefully wedged teh edge of the spatula under the fish. Working my way around the fillet, I managed to release it and flip it over. I did the same with the second. What surprised me was that the color of the fish on the traditional pan was a rich golden brown while the non-stick pan gave me a darker brown crust. It was kind of a pain to scrape the fish off the traditional pan without destroying the fillet though. I started a second timer for the traditional pan - also at 5 minutes.

Once the five minutes were up for each of the pans, I removed them promptly onto a serving plate. In both cases, the fish were perfectly cooked - crispy exterior with almost flaking (but not quite flaky) interior. Also, the color from the traditional pan was a little better than the non-stick (although I couldn't discern a difference while tasting). However, the non-stick pan provides that extra insurance that a flip will be quick, easy, and efficient. In addition, the extra oil used in the traditional pan made for a bigger mess to clean up. When I usually use a non-stick pan, I will actually brush the oil onto the fish fillet and then pan fry without additional oil. This creates very little sizzle or splatter and makes for quick kitchen cleanup.

Pan Fried Fish Fillets
1 Tbs. oilheatpan fry
Fish filletsseason
Salt
Pepper

Pan frying time
Fillet ThicknessCooking Time on each sideFat
Thick - 1 inch5 minutes1 Tbs. olive oil
Medium - 3/4 inch4 minutes1/2 Tbs. olive oil & 1/2 Tbs. butter
Thin - 1/2 inch3 minutes1 Tbs. butter
The olive oil should have a high smoke point - use either high quality extra virgin olive oil for more flavor or light olive oil.

Thursday, July 01, 2004

Recipe File: Prime Rib or Standing Rib Roast

Prime rib used to refer to a prime grade standing rib roast, but these days all rib roasts (and some rib steaks) are called prime rib regardless of the USDA grade it recieved. The rib roast cut is usually so good that it doesn't need much seasoning. The ingredients I use are simple: a standing rib roast, salt, and pepper.

Preparation is also quite simplistic for an entree with such a grand reputation. In fact, with a couple tools, this dish is easier to prepare than any other special event food (roast duck, turkey). The items you'll need are a roasting pan (usually comes with your oven or you can get a large baking pan and a wire rack to place in it), a probe thermometer (like the Polder model that I use), some kitchen twine, and a pair of tongs.

Hmmm, now you need a standing rib roast (also known as prime rib even if the beef isn't prime quality). The term "standing" means that because the bones are included in the roast, the roast can stand by itself. A rib roast with the bones removed is commonly referred to as a rolled rib roast. My preference is for the standing variety because the bones provide additional flavoring to the roast. A rib roast comprises of seven ribs starting from the shoulder (chuck) down the back to the loin. Each rib feeds about two people, so if you have a party of eight, buy and cook a four rib roast. The rib roast closest to the loin is more tender than the rib roast nearest the chuck. This end is referred to as the small end rib roast or loin rib roast or sirloin tip roast. The chuck end of the rib roast is bigger and tougher and is sometimes referred to as a half standing rib roast or large end rib roast.

Depending on preference, you can dry age the roast for a few days to bring out additional flavor and produce a more buttery texture in the muscle (aging allows the natural enzymes to break down some of protein in the meat). Age the beef up to a week in the refrigerator by leaving it uncovered on a wire rack over a large pan to catch any drippings for at least a day and no more than seven days. When you are ready to cook the beef, trim off any dried pieces after the aging. It is common for a roast to lose about 10% to 15% of its weight during a week of aging.

Take the rib roast out of the refrigerator and let it sit on the counter for a couple hours to raise the roast temperature to near room temperature. To help cook the roast evenly, we'll need to tie the roast. Using kitchen twine, tie the roast parallel to the rib bones at least at each end. I usually tie between each pair of ribs. Heat the roasting pan or a separate pan on the stove until hot with a little oil. Place the roast on the pan and sear for three minutes on each side. Remove from heat and season heavily with salt and pepper. Place on the grill of your roasting pan or on a wire rack. Now stick the probe of your thermometer into the roast so that the probe is approximately in the middle of the roast (and not touching a bone). Position the pan on an oven rack in the lowest position of your preheated 200°F oven. Yes, 200°F. The low heat will evenly cook the roast so that most of the roast will be at the desired temperature. Cooking at a higher temperature will finish the roast faster, but you will probably result in well-done on the outside of the roast that gradually results in a medium-rare interior (if you are trying to cook a medium-rare roast). Roasting at 200°F will result in almost all the meat ending at medium-rare.

Set your thermometer for 130°F for a medium-rare roast (125°F for rare; 145°F for medium; any higher and it's overdone - you might as well be serving a cheaper piece of beef). When the roast is done (about 45 minutes per pound), remove from the oven, set the roast aside, and let it sit to redistribute juices for at least twenty minutes. This is a good time to make a jus from the drippings of the roast.

Pour off any extra grease that's collected in the pan. You can save this to make Yorkshire pudding if you wish. Now deglaze the pan by pouring in 1/2 cup beef broth and bring to a boil. After you've scraped off the bottom of your pan and mixed it into the jus, season with salt and pepper. Simple.

When slicing the roast, first cut the rib bones out and then lie the roast on the cut side to carve large slices off the roast.

Since prime rib is a fairly pricey roast, I didn't purchase one for the sake of taking pictures for this article. The next time I roast one, I'll take pictures. I did however prepare a cross rib roast (a cut from the chuck or shoulder that costs less than $3 per pound) in a similar manner as I described for the rib roast. Note how the medium-rare pink is uniform to the edges of the roast.


Standing Rib Roast
1 loin rib roast, trimmed & tiedsearseasonroast at 200°F until 130°F
salt
pepper

Jus
rib roast drippingsdeglazebring to boilseason
1/2 beef broth
salt
pepper

Yorkshire pudding
1 cup all purpose flourwhiskbeatpour mixture into panbake at 450°F for 15 min.bake at 350°F until golden brown (15 min.)
1/2 tsp. salt
2 large eggswhisk
1 cup whole milk
13 x 9 in. pan10 min. at 450°Fmelt
1/4 cup rib roast drippings or
4 Tbs. melted unsalted butter

Tuesday, June 29, 2004

Equipment & Gear: Kitchen Knives

The knives in your kitchen come in all sizes and shapes. Some are for dining, chopping, slicing, carving, and tearing. But which knives are made for what purpose and which are essential to have in your kitchen?

In this article, I'll look at some popular knives and discuss what each type of knife is designed for (and some unconventional uses for them).

Chinese Cleaver (Asian Cleaver)
The chef's knife is the one knife that is consistently rated as the single most essential in the kitchen. However, if I could only pick one knife to have in the kitchen, it would be a Chinese or Asian cleaver. This knife's sharp edge is thin enough and sharp enough to easily cut and mince food and at the same time strong enough to handle light cleaving jobs. The side of the blade can be used to smash garlic and ginger and the top edge san be used (with care) as a meat tenderizer. The broad blade is often used to move food from the cutting board to the stove. However, due to the overall shape and size of a Chinese Cleaver, there is not as much precision as a chef's knife. Since I have a full compliment of knives, my Chinese cleaver sits on the sidelines waiting for the day when I can only have one knife to use.

Chef's Knife
Amazon.com: JA Henckels Pro S 8 in. Chef's KnifeThe most versatile knife in the western kitchen is the chef's knife. It is used for cutting, slicing, chopping, and mincing. The curved blade allows rocking back and forth for fine chopping and mincing. Chef's knives come in blade lengths from 6 to 12 inches. The longer the knife, the more you can cut, but the more difficult it is to control. If you've got small hands (like I do), you may want to stick with the 6 to 8 in. variety. Tina uses a 6 in. while I find the 8 in. allows me to grip the knife just forward of the bolster with my forfinger and thumb without discomfort (the 6 in. is slimmer so the back of the knife digs into the side of my knuckle). If you've got one of these and a board scraper, you won't need or want to use an Asian cleaver.

Santoku
Amazon.com: Shun Classic 6-1/2 in. SantokuThis is the Japanese equivalent of a chef's knife and has been gaining in popularity in Western kitchens. It has a broad blade and a tip that is lower than a chef's tip. Typically made thinner than a chef's knife, it does not have as much structural strength or weight, but is great at all chef's knife functions except for cutting through bone. Many brands now carry santokus, but a few have made poor design decisions (edge is almost flat, tip too low, knife too thick, etc.). The Shun Classic Santoku shown here is probably the best santoku on the market right now. Unfortunately, for left handers, it's a right handed knife (the unique D crosssection handle fits right handers).

Paring Knife
Amazon.com: JA Henckels Pro S 4 in. Paring Knife The paring knife is great for working a blade in a small space. Paring apples, cutting fruits, butterflying shrimp, and seeding a jalapeno are just some of the tasks the paring knife is well suited for. The paring knife has a thin blade that makes it easy to manuever while cutting. The sharp tip is also useful for removing potato eyes and other such tasks. In general, a paring knife is simply a miniature chef's knife - designed with the same curves and angles but smaller. This makes switching between the chef's knife and the paring knife a natural action.

Carving Knife (Slicing Knife)
Amazon.com: JA Henckels Pro S 10 in. Granton Edge SlicerAmazon.com: JA Henckels Pro S 8 in. Carving Knife
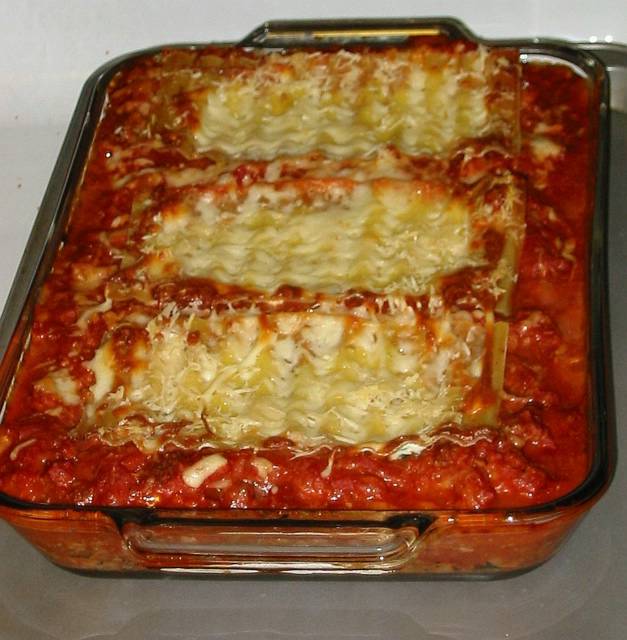
A carving knife's special purpose is to carve poultry, roasts, and hams after they have been cooked. Carvers typically have points to reach into tight places, but roast beef carvers have blunt ends. Some have hollow recesses along their blades and are referred to as granton or hollow edged or scallops. These air pockets allow for thinner slicing because they prevent meat slices from adhering to the blade. Why use a slicer instead of a chef's knife? Thickness. A carving knife is much thinner, enabling the knife to slice through finely while a thicker knife will wedge and tear the cooked meat once it cuts in too deep.

Bread Knife
Amazon.com: JA Henckels Pro S 8 in. Bread KnifeA bread knife's job in life is to cut, you guessed it, bread. Many breads have a hard crust which keeps a slicer or chef's knife from digging in and gripping the bread when you start to cut. You can use the tip of the chef's knife to punch a hole where you want to cut and then slice, but what about soft breads? With soft breads, the chef's knife doesn't clip around on the crust, but while you cut into the bread, you compress it instead of slicing clean through. A bread knife solves both problems by providing large serrations that grip the crust and can saw through soft breads without squishing them. This knife is also useful for cutting dense cakes (yellow cakes, pound cakes), but use a fine serrated knife for light cakes (angel food cake).

Utility Knife
Amazon.com: JA Henckels Pro S 6 in. Utility KnifeThis knife is the in-between knife. If you've got a 4 in. paring and a 10 in. chef's, you might want a 6 in. utility knife for all those jobs in between. Sometimes it's also called a tomato knife (usually when it has medium serrations) or a sandwich knife. Since Tina uses a 6 in. chef's knife, I use that instead.

Boning Knife (Fillet Knife)
Amazon.com: Victorinox 6 in. Boning KnifeThis thin knife allows you to remove membranes from meat and meat from bones easily. Usually, it is made thin enough for the blade to be a little flexible. Typically, this will be the sharpest knife you own because it will also be the thinnest knife. Use this to cut anything soft that needs fine precision work, but don't cut semi-frozen meat with this blade (use a chef's knife for that). The Victorinox or RH Forschner brand boning knife with Fibrox handle is probably the best boning knife available and is 1/5 the cost of most high end knives. This model goes for $10 and the handle doesn't get slippery when coated with juice and membrane from the poultry you're working on.

Meat Cleaver
Amazon.com: JA Henckels 6 in. Meat CleaverThis knife is used to hack pieces of meat with bone apart. Usually imprecise due to the amount of force you need to use, the meat cleaver sections meat pretty well. I suggest using a seperate cutting board because you'll probably cut into the board a bit. In western cooking, there will be very little need for this knife because most of the time we trim the meat off the bones. When quartering a chicken, a boning knife is used and we avoid cutting through bone (unless we're doing it Asian style where having slivers of bone is part of the look and feel). Most of the time the butcher handles the bone cutting for us with their rotary and band saws (which produce much cleaner cuts and a meat cleaver).

Steak Knife (Dining Knife)
Amazon.com: JA Henckels Pro S 4-1/2 in. Steak Knife This is the knife your guests will use to tear cooked meat into bit sized chunks. It's usually best to have large pieces of cooked meat served whole to preserve the juices and have your guests cut them. A steak knife does not cut meat as much as it tears very finely.

What to look for in knives? Here's a short list of stuff people usually tell you what to look for:
  • Full tang - The tang is the part of the knife blade that is embedded in the handle. It is not necessary to buy a knife where the tang goes all the way to the back (full tang). Make sure it has at least 3/4 tang though, any less and the balance might feel weird (you don't feel like you're holding the knife; it feels like your holding a handle that's holding the knife...), constant use of over the years could result in loosening of the blade from the handle, or it might just fall out if you use too much force.

  • Forged - Stainless steel knifes are generally forged or stamped. Forged knives are typically more durable and are usually thicker (more structural support). I like my chef's knives to be forged and my bread knife to be stamped (because stamped is thin and cheap). You can get all forged, but it will cost more (a nice forged slicer will also be thin, but will be pricey compared to a stamped version). The forged ones are reputed to hold an edge longer as well. I'll take this opportunity to point out that some companies like J.A. Henckels have started to do a composite stamp/forge which they claim makes their knives better than plain forged. Basic metallurgy tells us that it's probably not true, but personally I like the feel of their knives and haven't had any complaints about durability or cutting ability.

  • Diamond edges - Some knives advertise "never need sharpening" due to a diamond coated edge (or something like that). I would recommend against these knives because they do eventually get dull and you can't sharpen them. Same with ceramic knives - you have to send them back to the factory for sharpening.

  • Serrated edges - Some knives are serrated. That's fine. Some chef's knives are serrated. That's not fine. Serrated knives cut by tearing. This is fine for some foods (breads and cakes) but not for food preparation. A sharp smooth edge works better than a serrated edge - just remember to use a slicing action instead of pushing down through the ingredient (chopping). Remember, we're cutting, not sawing.

So what's the final verdict? Here we go:
Buying 1 knife only
  • Either Chinese cleaver or Santoku
Buying 2 knives
  • Chef's knife (or Santoku; from now on, I'll just say Chef's knife but I mean either)

  • Paring knife
Buying 3 knives
  • Chef's knife

  • Paring knife

  • Carving knife (if you roast) OR bread knife (if you eat a lot of bread)
Buying 4 knives
  • Chef's knife

  • Paring knife

  • Boning knife (unless you don't prepare beef, pork, poultry, or fish)

  • Carving knife (if you roast) OR bread knife (if you eat a lot of bread)

How about buying a knife set? It depends. Most of the time knife sets come with one or two good knives and the rest are not so good (that's why they put it in a set). Often you're better off buying the knives individually and as you need them instead of all at one time.

Monday, June 28, 2004

Saturated Fats, Cholesterol, and Heart Disease

So, last Wednesday I made a Coconut Creme Pie and brought it into work. No surprise, it was completely consumed with other coworkers on the waiting list for slices that were disappointed. What was surprising was a couple of the consumers commented on how bad the pie must be for their bodies. I assured them that I used no additives and kept the ingredients as fresh as possible. I admit that there were some trans fats in this particular pie because I was unable to get graham crackers without partially hydrogenated oils. It turned out that they were concerned mainly about the coconut. One of my coworkers who was watching his cholesterol levels said, "It's high in cholesterol!" I assured him that as a plant product, it was impossible for coconut to have cholesterol. Then he said, "Well, it's high in saturated fat then."

Ah, saturated fat. The most maligned and misunderstood "bad" food in the last thirty years. During the last year, I've been trying to figure out why everyone thinks saturated fat is evil and I have been unable to discover any evidence that there is evidence that saturated fats are bad for you. In fact, quite the opposite. I'll take this space and discuss briefly (although it might seem long to you) saturated fats, polyunsaturated fats, cholesterol, and the misconceptions we've been brought up with. I'll touch briefly on trans fatty acids too, but that topic is so nasty that it really deserves it's own article along with the possible manipulation of the American diet by food oil companies. Okay, back to saturated fat.

Something that doesn't help is that saturated fat is specifically called out on nutrition labels on food products as well as a Daily Value Percentage. This makes it seem that we need to limit the intake of saturated fat but not monounsaturated or polyunsaturated. This implies that saturated fats are worse than the other two fats and that is not the case.

A little background first:
Fats are comprised of fatty acids which are long chains of carbon atoms with hydrogen atoms hanging off them:
     H H H H H H H H H H H
COOH-C-C-C-C-C-C-C-C-C-C-C-H
     H H H H H H H H H H H
(lauric acid)

(This molecule can be written as CH3(CH2)10COOH.) If all the carbons between the carboxyl (COOH) group and the methyl (CH3) group have two hydrogen atoms attached to them then the fatty acid is considered to be saturated. A saturated fatty acid is more or less straight (in reality the carbons zigzag a bit, but the overall chain is straight). This causes the fatty acid to have a high melting point. The longer the chain, the straighter the chain, the higher the melting point. That means most saturated fats are solid. In addition, the carbon single bond is quite strong resulting in a molecularly stable fatty acid.

Unsaturated fats refer to fats containing fatty acids that do not have as many hydrogens attached as is possible. Instead of bonding to hydrogen, one or more carbon atoms form a double bond with the next carbon:
     H H H H H H H     H H H H H H H H
COOH-C-C-C-C-C-C-C-C=C-C-C-C-C-C-C-C-C-H
     H H H H H H H H H H H H H H H H H
(oleic acid)

This is a monounsaturated fatty acid because it has only one carbon double bond. This particular fatty acid (oleic acid) has a double bond in the ninth position from the methyl (CH3) group making it an omega-9 fatty acid. The majority of olive oil's monounsaturated fat is comprised of oleic acid. The double bond causes a bend in the chain (away from the missing hydrogens) so that the chain is no longer straight. This lowers the melting point and causes unsaturated fats (like olive oil) to be liquid at room temperature. Also every double bond in a fatty acid "weakens" the structure.
When a fatty acid has more than one carbon double bond, then it is considered polyunsaturated:
     H H H H H H H     H     H     H H
COOH-C-C-C-C-C-C-C-C=C-C-C=C-C-C=C-C-C-H
     H H H H H H H H H H H H H H H H H
(alpha-linolenic)

This particular fatty acid (alpha-linolenic acid) has the first double bond in the third position from the methyl (CH3) group making it an omega-3 fatty acid. This fatty acid is found most commonly in flaxseed oil and salmon. Because of the three double bonds, this fatty acid is fragile and very sensitive to light and heat. Also, because of the three double bonds, this fatty acid curves back on itself and has a very low melting point.

When exposed to free radicals (molecules with unpaired electrons that are highly reactive), polyunsaturated fatty acids can undergo a process called lipid peroxidation which results in the polyunsaturated fatty acid to release additional free radicals. Lipid peroxidation has been directly linked to artherosclerosis (the constriction of the arteries due to build up of a plaque composed of fats, cholesterol, and other substances) and coronary heart disease (artherosclerosis of the coronary arteries that lead to the heart). Free radicals have little or no effect on the more stable monounsaturated and saturated fats.

It is commonly believed that the build up in the arteries is predominantly saturated fat and cholesterol. This is an inaccurate or incomplete statement. The plaque in the arteries varies from subject to subject, but it has been demonstrated that 3/4 of the fatty acids present in arterial plaque is unsaturated. [1] Also, cholesterol's role in the body is ignored when discussing artherosclerosis. The plaque formed in the arteries does contain substantial amounts of cholesterol, but probably because cholesterol is used as a healing agent. The damaged interior artery walls are patched up with cholesterol and then additional plaque builds up and more cholesterol is used to patch up the walls. The cholesterol is most likely not a cause of the plaque build up, but instead a body reaction to the plaque. The fact that no cholesterol is found sticking to the interior vein walls (where cholesterol concentration is the same as in the arteries) as you would expect if you were to believe the predominantly advertised theory that cholesterol causes circulatory disease. [2]

This brings us to the common belief that saturated fat increases the blood LDL cholesterol levels which in turn cause artherosclerosis. Low Density Lipoproteins (LDL) carry cholesterol from the liver to the tissues while High Density Lipoproteins (HDL) carry cholesterol in the blood back to the liver to be broken down. The buzz words "good" cholesterol and "bad" cholesterol have been used to label HDL and LDL, respectively. The belief that saturated fat lowers HDL in the blood is backed by several scientific studies, but there are also a number of studies that show that saturated fat intake can result in an increase in HDL as well. [3]Currently, there is no conclusive proof that saturated fat intake can be correlated to change in HDL/LDL ratio in the bloodstream.

An even more interesting fact is that the claim that LDL and HDL levels play an important part in heart disease and that there is a fight between "good" and "bad" cholesterol is short on supporting evidence (but long on media support). There seems to be as much scientific data that populations with high incidents of coronary heart disease tend to have higher levels of HDL (so-called good cholesterol). In addition, low levels of HDL do not correlate to an increased risk for coronary heart disease. Most interesting of all, is a study of people who have genetically caused reduced levels HDL do not have a higher risk of coronary heart disease. [4] Studies across several countries with similar HDL-LDL levels resulted in very different incident rates of heart disease. If the theory that HDL-LDL leads to heart disease is to be true, then a more consistent death rate from the disease would have been evident in these countries. It has also been shown that cholesterol level in the blood stream has no correlation with heart disease. In fact, over 80% of people who suffer heart attacks, do not have elevated cholesterol levels. [5] In addition, only 30-40% of people with artherosclerosis have elevated cholesterol levels. [6] It seems that cholesterol is neither a good indicator nor a risk factor for heart disease. (Note: A very small percentage of people have a genetic illness called hypercholesterolemia which interferes with their ability to matabolize cholesterol. People with this genetic condition do have to watch blood cholesterol levels.) [7]

So, what is the next most likely candidate for leading to heart disease? Lipoprotein (a) or Lp(a) has been pointed to as a coronary heart disease risk factor. [8] Although research is incomplete, early findings have been strongly suggesting that Lp(a) contributes to and promotes atherosclerosis. Evidence currently points to trans fatty acids as a major increaser of Lp(a) levels. What's ironic is that saturated fats have been linked to lowering Lp(a) levels! [9]

So, what are trans fatty acids? In polyunsaturated fatty acids, the chains naturally are found to all bend in the same direction. In chemistry this is referred to as cis. If the bends alternate, then this is referred to as trans.
     H H H H H H H     H H H H     H H
COOH-C-C-C-C-C-C-C-C=C-C-C=C-C-C=C-C-C-H
     H H H H H H H H H H     H H H H H
(trans-9,12,15-octadecatrienoic acid)

Trans fatty acids are created through partial hydrogenation of fats (natural or chemical). In nature this occurs rarely and results in very small amounts of trans fatty acids. In our supermarkets, this is a common place fatty acid. It was discovered that if you partially hydrogenated a fatty acid, about half of the fats would have bends going the other way (not in the same direction: cis), thus straightening out the chain. This causes the fatty acid to have a higher melting point, allowing the public to enjoy solid fats without the saturated fat (which was thought to be bad at the time). Margarine replaced butter, shortening replaced palm oil and lard, and partially hydrogenated soybean oil replaced coconut oil. During the last ten years, a great deal of research has been performed on trans fatty acids and the conclusions are not good. Trans fats (fats made of trans fatty acids) promote artherosclerosis and other cardiovascular dieases and increase the risk factor for cancer. In addition, trans fats have been found to replace necessary saturated fats in fat cells resulting in an unusable substance taking the place where a fuel and nutrient source should have been. This leads to the body increasing capacity of fat cells in order to maintain fuel and nutrient storage levels. Trans fats are also unstable and may lead to promotion of free radicals in the human body (for the same reasons that polyunsaturated fats do).

So, now we have discussed how saturated fats do not cause directly or indirectly heart disease, cholesterol is not an indicator or risk factor of heart disease, polyunsaturated fats should be reduced in the diet, and trans fats are to be avoided completely. (Pretty much the opposite of what the media and food oil producing companies tell us.) But, I haven't discussed any benefits of saturated fats.

Before I get into that, I want to mention that although a reduced polyunsaturated fat intake is recommended, there are two families of essential fatty acids that we should intake: omega-3 and omega-6. These are polyunsaturated fatty acids where the double bond is three or six carbons from the methyl group. About 1-2% of the calories you intake in a day should be omega-3 and about 2-3% should be omega-6. Too much omega-6, however, can limit your body's ability to use omega-3 fatty acids. Omega-3 fatty acids can be found in fish, flaxseed, walnut, and unprocessed soybean oil (the processing that removes color and oil from soybean oil pretty much destroys all the linolenic acid in it).

In a past article, I've mentioned that I cook predominantly with olive oils and butter. Here's why: olive oil is high in monounsaturated fat. In fact it is less than 10% polyunsaturated. Butter is less than 4% polyunsaturated and contains a large amount of heathful substances. These include naturally occuring vitamins (A, D, E, and K), small amounts of linoleic (omega-6) and linolenic (omega-3) acids, butyric acid (demonstrated anti-tumerigenic properties and a major fuel source for intestines), lauric acid (anti-microbial and anti-viral), glycosphingolipids (protects against intestinal infections), conjugated linoleic acid (strong anti-cancer properties and helps prevent weight gain; found only in butter and milk from grass-fed cows), lecithin (assists in metabolising cholesterol and fat components), selenium (aids vitamin E as an antioxidant; butter is one of the richest selenium food sources available), and cholesterol. It might seem weird to list cholesterol as a benefit, but cholesterol is a precursor to vitamin D and many hormones as well as an antioxidant and the body's primary repair substance. Consuming cholesterol also contributes to intestinal wall health. Ingesting cholesterol on a regular basis has been shown to not increase blood cholesterol levels because the body reduces its natural production and increases cholesterol metabolism to compensate.

It should also be noted that the small amount of ingested cholesterol can hardly be noticed in the large amounts of cholesterol flowing in your blood stream. For example, if you are capable of intake half of the cholesterol you consume daily (let's say 150 milligrams of 300 milligrams consumed) and you compare that to the amount of cholesterol in the blood (150 mg/dL), then you'll find that of the 7500 mg of cholesterol in your blood (150 mg/dL * 10 dL/L * 5 L/human) you've added only another 150 milligrams (assuming your body is even capable of intaking 50% of the cholesterol you've ingested). A healthy body can easily throttle back cholesterol production and increase metabolism to absorb the additional cholesterol intake.[3]

1. Felton CV, et al; Dietary Polyunsaturated Fatty Acids and Composition of Human Aortic Plaques. Lancet, 1994.

2. Cranton EM and Frackelton J; Free Radical Pathology in Age-Associated Diseases. Journal of Holistic Medicine, 1984.

3. Enig M; Know Your Fats: The Complete Primer for Understanding the Nutrition of Fats, Oils and Cholesterol; Bethesda Press, 2000.

4. Smith R and Pinckney E; Diet, Blood Cholesterol, and Coronary Heart
Disease: A Critical Review of the Literature. Vector Enterprises, 1991.

5. Rowland D; The Nutritional Bypass. Heath Naturally Publications, 1995.

6. Reiser R; The Three Weak Links in the Diet-Heart Disease Connection. Nutrition Today, 1979.

7. Byrnes S; Diet and Heart Disease: It Is Not What You Think. Whitman Publications, 2001.

8. Garrison J and Somer E; The Nutrition Desk Reference; Keats Publishing, 1995.

9. Enig M; Fat Facts; Price-Pottenger Nutrition Foundation Journal, Winter 1998.